I have generally struggled with placing my ads manually and this has caused me to find solutions to automate this part.
While there are several methods to automate this, it’s hard to find a good one that can work in all scenarios.
It’s kinda true that now some ad networks come with automatic ad placements, I feel that the ad placement choice of this automatic system is ugly.
The automatic ad placement sometimes fills the ads into the most bizarre places such as above the header with unwanted ad banner sizes such as 300×250.
I am sure, you certainly don’t want that to happen to your site only to find your readers getting annoyed by not finding the content above the fold.
Assuming that you have ten blog posts, you may put ad codes between paragraphs if you would like to show the ad banners in particular positions.
Now one day you decide to change the ad locations. You simply remove the ad codes from the original positions and place them somewhere else or add/remove them according to your needs.
After 1 year, you now have One Hundred blog posts and you have inserted ads manually into each post. Now you want to change positions again to try new things or want to try a new ad network.
Removing the ad codes will take you a whole day or two and then adding them again will take another. You certainly don’t want this because it’s time-consuming and not practical.
Now, there are some themes that allow manual ad placements but can be controlled from one place. The theme of this website(Rehub) allows it and the Jannah theme which I use on one of my other sites also has the option for doing that.
Typical built-in theme function
However, those options are limited and you cannot have more than a couple of ads and most of these themes don’t support every ad code or give you full control over them.
Ever wanted to display a particular type of ad on only one device or wanted to disable ads in particular places on some pages?
Yes, this is where the problem starts and this is the reason why I started finding a decent plugin for the same.
Most Ad Management Plugins Aren’t Enough
There are a handful of good plugins for managing your ad banners but honestly, I have always reached a limit where I was feeling stuck in a situation where I had to compromise on my creativity.
AdRotate, WPQuads, and Advanced Ads are some decent solutions for managing ads but they are time confusing, limiting, and not flexible enough.
You will have to create individual ads and choose a location for displaying them. That’s it and you are done with it.
While a lot of users will be satisfied with this generic functionality, this doesn’t give you the control to stop the ads from entering places that you don’t like.
Ad Inserter comes with both Free and Paid options and the Free one is sufficient for most users.
This one gives you the ability to show your ads as you like along with dozens of features but the Paid one gives you some pro functionalities like Ad Rotation based on CTR, sticky ads on the sidebar, A/B Testing, and much more.
Ad Inserter comes with a simple interface where you can switch tabs to edit any ad you like and have a simple disable/enable formula for each ad unit.
Display as Many Ads as you Want
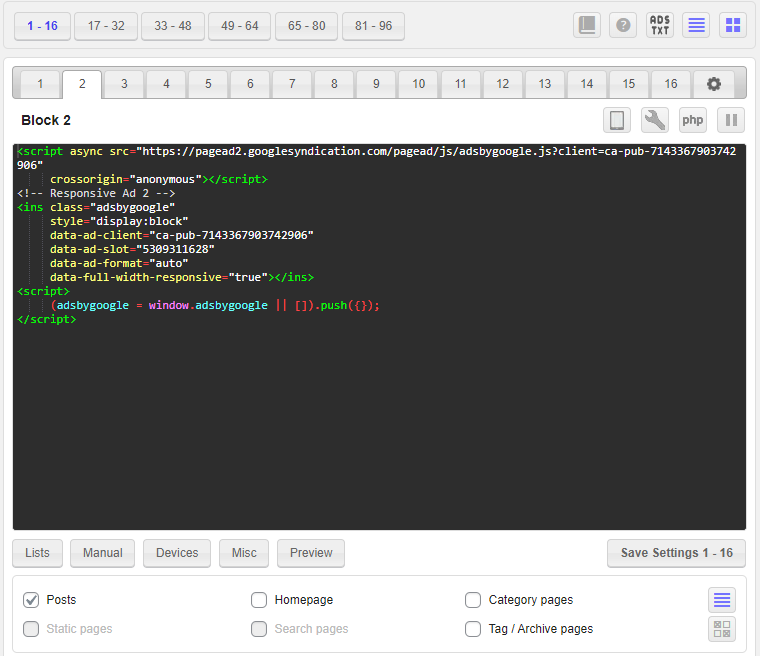
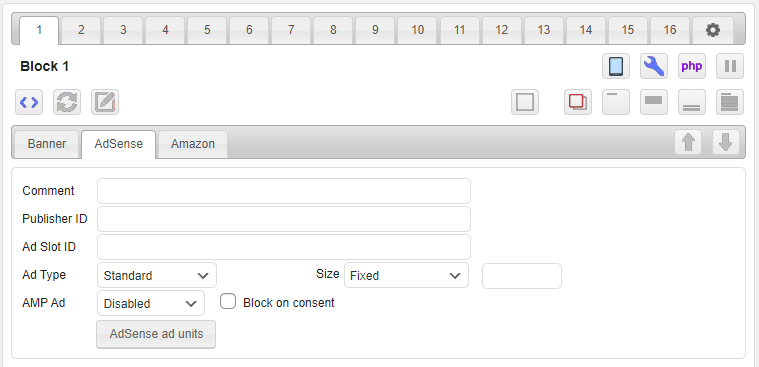
This is the default interface of Ad Inserter and by turning on the “List of all blocks” from the top-right icon, you can switch to the next 16 tabs.
There are six tabs in total consisting of a total of 96 ad unit placements which is insane. I don’t think anyone would be using that much but this is a plus for those who want to have custom settings for multiple pages.
Besides that purple Icon in the image, you will find another purple Icon with multiple horizontal lines. These Icons turn purple when they are switched on and enable a particular function for you to see.
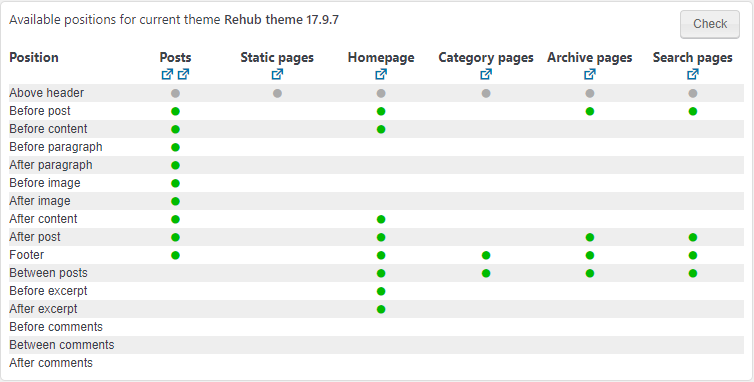
That Icon will enable a separate window on the right side showing you all the available positions your theme can support for showing the ads.
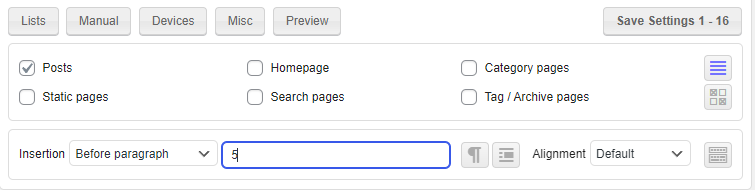
Once you click on the “Check” button, it will show you detailed information on where you can display your ads in Posts, Static Pages, Homepage, and other types of pages.
This will avoid any confusion if your ad fails to show up on a particular page because that was not supported in the first place. With every theme, you will have different availability but for the most part, Posts pages will have the highest availability.
As now you are familiar with the interface, it’s time to insert your first ad.
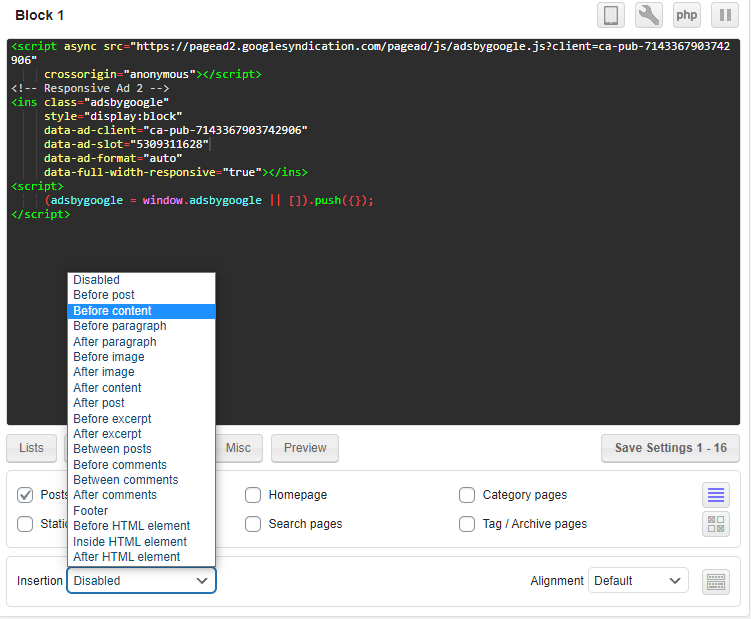
Copy the ad code from your ad network which will generally be a Javascript code or a tag. Place it in the empty space in the first tab and then at the bottom find the insertion option.
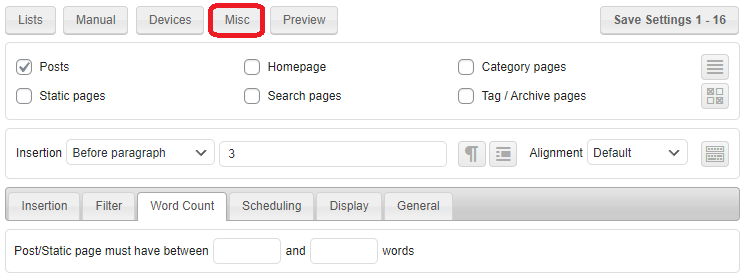
From the drop-down list, you can choose any placement on your site through these specific instructions. Alternatively, for ads to be displayed between content, you should choose “Before paragraph” or “After paragraph”.
As you can see the plugin also allows you to place the ads after any paragraph and also gives you the power to enable/disable them on specific pages. Moreover, you get the Alignment option if you want to display the ad on the left, center, or right side of your content.
Once, you are done selecting these options, press the “Save Settings” button and you are good to go.
Ok, here comes the fun part. With the help of the four options mentioned, you can make adjustments to the ads in order to change their behavior.
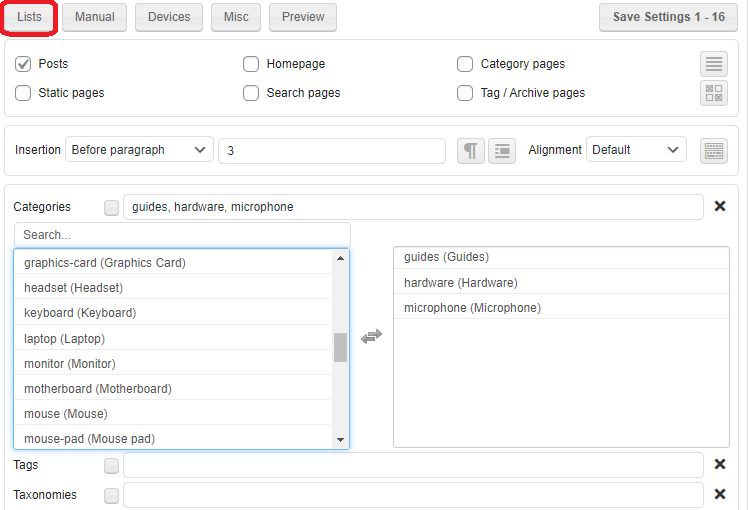
The first one “Lists” will help you restrict the ads on specific types of pages. You can choose those pages on the basis of categories, tags, taxonomies, etc.
This way you can show a particular type of ad on pages relating to that category. For example, if you have a custom ad banner for promoting a Camera, you can select the Camera category to show this ad only in the posts belonging to this category.
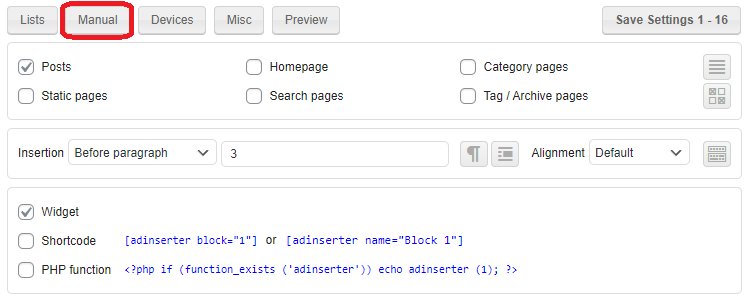
The next one is “Manual” which will enable the options to display the ads through the Shortcode or PHP function. These codes can be pasted anywhere on the site to show that particular ad.
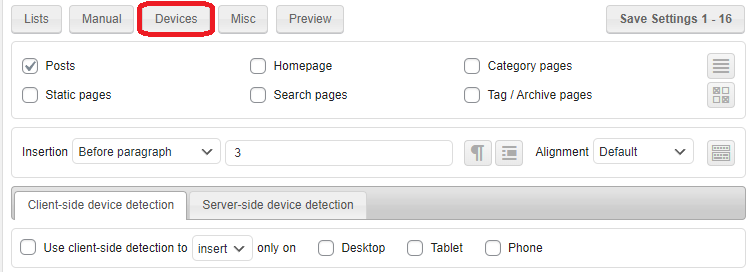
With the third option “Devices”, you can disable your ads on certain types of devices.
This is so much helpful in restricting the ads that are not fit to be served on some devices. For example, a 728×90 ad unit won’t fit on a mobile device. So, you can disable it using this option.
Similarly, you can disable showing the smaller mobile-specific ad banners on the desktop or tablet if you would like to show only standard-format ads.
The fourth one is “Misc” which enables several advanced options for filtering or restricting the ads based on the word count. You also have Scheduling, Display, and Filter options but those are for the rare cases.
Block the Ads from Tables and Blocks
I remember the frustration of adjusting my content to the point where I have to break the paragraphs into a fixed number of parts in order to display ads between them.
This is because in affiliate articles, at a certain point, you would want to show your product boxes.
Most Ad Management plugins simply count every heading, table, and box as a paragraph and the result is an unwanted ad inside a box or table.
With Ad Inserter you can fix this successfully, however, if you are using Ezoic Auto ads placement, you will have to talk to your Ezoic manager to fix this problem.
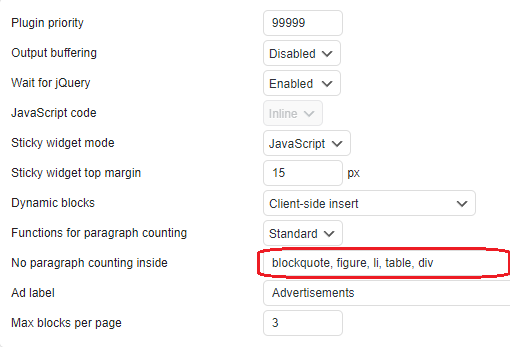
Now if you are placing ads manually through this plugin and don’t want any ads inside your tables or product boxes or even Divs, you just have to click on the Settings button and click on the Front End button.
In the “No paragraph counting inside”, fill in “blockquote, figure, li, table, div” and this will stop ads from entering into your tables, quotes, boxes, divs, as well as lists.
Pretty convenient, huh?
This for me is a game changer as it avoids ruining the reading experience.
Wait, there is More?
Look at the number of tabs in the Settings menu. The options for tweaking things are simply overwhelming.
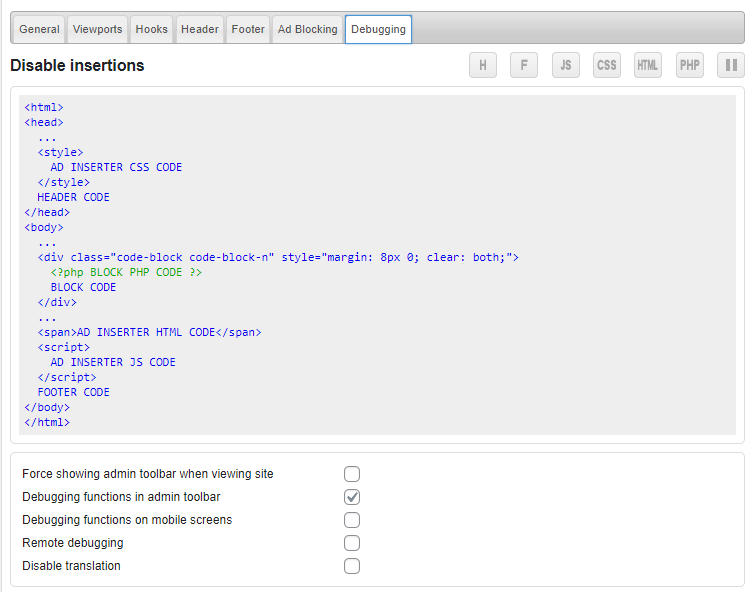
Not every setting is meant for you especially debugging which requires coding expertise. Still, these things are pre-included with the Free version.
Now when you click on the various buttons on the top-right, you can enable many options. Just switching on the Settings option will give you the custom settings for each type of ad unit.
Moreover, you enable the PHP mode or edit the Ads.txt file without accessing your root folder.
At this point, I don’t see any other Ad Management plugin superior to this one and if you want to download the free version, Click Here.
If you want to buy the Pro version, you will have to pay €20 for all the advanced features such as sticky ads, A/B testing, and Ad rotator. Use the link below to check it out.